
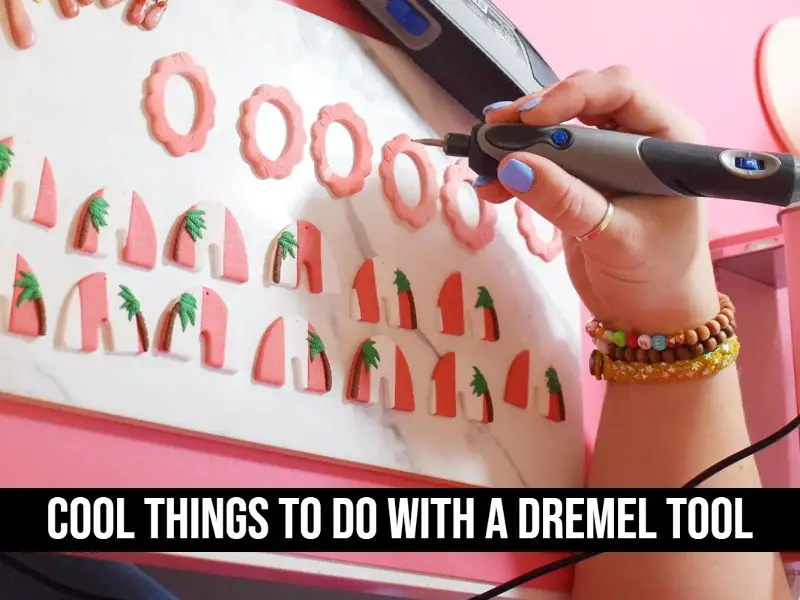
If you’re looking for a way to add some creative flair to your next project, a Dremel tool can help you do just that. With the wide range of accessories and attachments available, you can use a Dremel tool for a variety of interesting projects, from simple repairs and craft projects to more advanced woodworking.
A Dremel tool is a type of rotary tool that uses a variety of attachments and accessories to perform a variety of different tasks such as cutting, sanding, polishing, routing, and engraving.
So whether you’re a professional woodworker or a hobbyist who likes working on DIY projects, a Dremel is a great tool to have in your arsenal.
In this article, we’ll go over 15 cool things you can do with a Dremel tool.
What is a Dremel tool and what does it do?
A Dremel Tool is a versatile, handheld rotary tool with a variety of uses. It consists of a motor-driven spindle, which holds a variety of attachments and accessories, such as cutting bits, grinding stones, sanding discs, and polishing pads.
The tool’s speed can be adjusted from 5,000 to 35,000 rpm, allowing for precise control and accuracy. You can see this on amazon.
Dremel tools can be used for a variety of projects, from cutting and grinding metal to polishing and sanding wood. They are ideal for carving, engraving, and drilling into materials such as wood, stone, plastic, and metal.
Dremel tools are lightweight and easy to use, making them a great choice for a wide range of home and professional projects. With a variety of attachments and accessories, a Dremel tool can be used in place of traditional power tools, saving time and money.
5 Cool Things To Do With A Dremel Tool
Dremel tools are incredibly versatile and powerful tools that can be used for a variety of tasks beyond just DIY and woodworking.
From cleaning to carving, precision cutting to polishing, there’s so much you can do with a Dremel tool that you may not have even thought of! Here are 5 cool things you can do with a Dremel tool that don’t involve DIY or woodworking.
1. Clean Jewelry
Cleaning jewelry with a dremel tool is a great way to quickly and easily remove dirt and grime from jewelry. First, use the dremel tool to buff the surface of the jewelry in a circular motion until you have achieved the desired level of cleanliness. You may need to use a different tip depending on the type of jewelry you are cleaning.
Silver jewelry may benefit from a brass brush tip, while gold jewelry may benefit from a polishing wheel.
After buffing, switch to a polishing wheel to give the jewelry a nice shine. Once complete, wipe down the jewelry with a soft cloth and then store the jewelry in an airtight container to prevent further tarnishing.
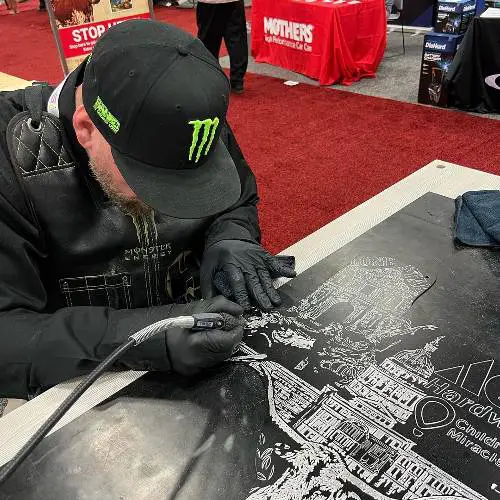
2. Engraving glass
Dremel engraving is a wonderful way to add a unique and personal touch to any glass object. To start, you will need to attach a diamond engraving bit to your Dremel tool.
Once the bit is secure, you can begin tracing the design of your choice onto the glass surface. To ensure a clean and consistent line, make sure to hold the tool at a steady angle with a steady hand. You can adjust the pressure and speed of your Dremel tool to suit the level of detail you want for your design.
As you trace, you should notice the diamond bit creating a groove in the glass surface. To create more intricate details, you can use a variety of attachments and bits.
When you have finished your design, you can remove any errant glass pieces with a damp cloth. Engraving glass with a Dremel tool is a great way to create a special and lasting impression.
3. Sharpen Knives
Using a dremel tool is one of the easiest and most effective ways to sharpen knives. To begin, the person should make sure they have the right dremel attachment for the job.
It is important to use the right-sized burr, as using a burr that is too small won’t sharpen the knife effectively, while a burr that is too large could damage the knife. After attaching the burr, the person should turn on the dremel and hold the knife at the proper angle.
It is important to stay consistent when sharpening the knife and to use slow, even strokes. The person should also be careful not to apply too much pressure – it is better to go over the knife multiple times than to apply too much pressure in one go. After the knife is polished, use a cloth to remove any metal shavings before using the knife.
4. Cut metal
Precision and a steady hand are required when using a Dremel tool to cut metal. First, you need to decide what kind of tool to use.
The most common types of bits for metal cutting are the diamond wheel, the carbide wheel, the cut-off wheel, and the sanding bit. Once the bit is in place, you can begin to outline the shape of the metal you want to cut. Secure the metal to a flat surface, such as a workbench, and switch on the Dremel tool.
Use a slow and steady motion as you move the tool along the metal. It’s important to control the speed of the tool while cutting to ensure an even and consistent shape.
Sand any sharp edges after you’ve finished machining with a sanding bit. Lastly, use a wire brush to remove any debris or residue from the metal. With practice, you’ll soon become a pro at cutting metal with a Dremel tool.
5. Create a mold
Creating a mold with a dremel tool is a simple but effective way to make a variety of shapes and sizes. First, select the material you wish to use for the mold.
Then, measure and mark the area where the mold will be created. Next, use the dremel tool to cut the shape into the material. Start by using a coarse cutting bit to define the outline of the shape.
Then use a finer bit to refine the shape and create any details or texture desired. Sand the shape and eliminate rough edges with a sanding bit. Once you are satisfied with the results, the mold is ready for use.
5 Dremel Wood Projects For Beginners
Wood projects with a Dremel are a great way to get your feet wet without having to invest in a lot of tools and supplies. With just a few basic tools, you can create amazing pieces of woodwork in no time.
One of the great things about using a Dremel for woodworking is that it allows for a great deal of versatility. You can easily work with a variety of materials, from softwoods to harder woods, and create many different types of projects.
Here are 5 easy Dremel wood projects that you can start working on right away:
1. Wooden pen holders
Dremel tool beginners will love creating a wooden pen holder. Start by tracing the desired shape onto a piece of wood. Use a Dremel saw to hollow out the shape. Sand the edges with a Dremel sander to give a smooth finish. Use a Dremel drill bit to create holes for mounting the pen holder onto the wall.
Create a hole for the pen holder’s bottom as well. Then, use a Dremel router bit to create a design on the face of the pen holder.
You can use a Dremel engraving bit to add text, initials, or a logo. Lastly, use a Dremel to apply a finish to the surface, such as stain or paint. With a few simple steps, you can create a unique pen holder that is sure to be a conversation starter.
2. Wooden box
A wooden box with a dremel tool is a great beginner project that can easily be customized. To start, use a dremel tool to cut out the desired dimensions from a 3/4-inch thick piece of wood. Once the pieces are sliced, use sandpaper to smooth the edges. Next, glue the pieces together and clamp them into place.
Allow the glue to dry, and use a dremel to drill the hinges and hardware holes. Finally, use a dremel to sand and finish the box, adding any designs or artwork as desired. With a little patience, you can easily create a beautiful wooden box that can serve as a storage container or decorative piece.
3. Wooden wall art
Creating wooden wall art with a Dremel tool is an easy and fun project for beginners. To start, use the Dremel to cut out a shape of your choice from a piece of wood.
You can use a template for a more intricate design, or draw a simple shape freehand. Once your shape is cut out, use sandpaper to smooth out any rough edges on the surface. You can then paint or stain the wood to a color of your choice.
You can engrave details on the surface with the Dremel after the paint or stain has dried. This could be a name, a quote, a pattern, or anything else you’d like. Finally, attach a hook or hanger to the back of the board to hang your wall art.
4. Wooden birdhouse
Making a wooden birdhouse with a Dremel tool can be fun. Start by finding a suitable piece of material to use for the birdhouse, preferably something like pine, spruce, or cedar.
Cut the wood into the desired size for the birdhouse, then use a Dremel with a carving bit to make any decorative touches you would like. You may want to add some windows, doors, or even a perch.
Create a hole in the side or back of the birdhouse for the birds to enter. Once the shape and decorations are complete, seal the surface with a coating of polyurethane or paint.
You can then hang the birdhouse in your garden with any necessary hardware, such as a hanger. With some patience and care, your homemade wooden birdhouse will be ready for some feathered friends to come and stay.
5. Wooden bowl or spoon
Using a dremel tool, you can make a stunning wooden bowl or spoon with minimal effort. Start by choosing a piece of wood that you like and draw the shape you would like your bowl or spoon to take on it. Use a dremel bit to cut and shape the wood according to the drawing.
Begin by cutting along the lines of the drawing and then continue to carve the inside, making it deeper. Sand down any rough edges to ensure your bowl or spoon is smooth.
To bring out the natural beauty of the material, finish it with a wooden finish. By using a Dremel tool, you can create a beautiful wooden bowl or spoon with a little patience.
5 Dremel DIY Projects
With the increasing popularity of the Dremel tool, DIY projects have become easier than ever before. From intricate woodworking projects to simple repairs and upgrades around the home, Dremel tools can be used for just about anything.
1. Picture Frames
Creating a picture frame with a Dremel is an easy DIY project. You can easily create a frame for a favorite photo or artwork that will be unique and special. To begin, use the Dremel to trace the outline of the frame on a piece of material.
Then use a cutting wheel to cut through the wood. You can use a sanding wheel to remove rough edges or to help the pieces fit together nicely. Once the frame is cut, you can use a router to carve a design or pattern onto the frame.
This is a fantastic way to add some character to the frame and make it stand out. Once the frame is complete, use glue to attach the pieces and attach the backing and glass.
To make the frame even more special, you can paint or stain it with your favorite color. Dremel picture frame creation is simple but rewarding.
2. Candle Holders
You can spruce up your home for any season by making candle holders with a Dremel tool. Popular materials for Dremel projects include wood, plastic, and metal.
Choose the size of your candle holder, and then draw a template of your design onto the material with a pencil. Use the Dremel tool to cut the material according to your design.
Depending on the material, you may need to use different types of cutting bits. For metal, you might want to use a grinding bit.
For wood, you could use a routing bit. Sand down the edges and smooth out any rough spots. Finally, use a drill bit to make holes for the candle. Place the candle and admire your beautiful, handmade candle holder.
3. Create a custom lampshade
Creating a custom lampshade using a Dremel is a project that is not only fun but highly customizable. Start by gathering your supplies, which will include a Dremel, a cutting bit, a variety of sandpaper bits, and your preferred fabric for the lampshade. Begin by cutting the fabric according to the desired shape of the lampshade.
Use the Dremel to make precise and intricate cuts, or to smooth rough edges. Once the shape of the lampshade is complete, use the sandpaper bits to give it a smooth and polished look.
Lastly, attach the fabric to the lampshade frame, and you will have a unique and beautiful custom lampshade. With the right supplies and a bit of creativity, you can customize a lampshade with a Dremel in no time.
4. Make a custom clock
Creating a custom clock with a dremel is a fun and creative project. First, you need to choose a clock face, such as wood, metal, or plastic. Then, decide how you would like to design the clock. You can draw out a sketch of the design, or you can simply start cutting.
Next, prepare the surface of the clock face by sanding it to assure it is smooth. After that, use the dremel to cut out the shapes in the design. You can also use a router bit to make small grooves or shapes. After the design is complete, use a hole-drilling bit for the clock hands.
Once the clock face is complete, you can use varnish, stain, or paint to finish the clock. You can also attach additional decorative elements such as buttons, beads, or fabric.
You can now add the clock mechanism and hands to the clock face. With a little creativity, you can craft an original and striking custom clock with a dremel.
5. Make a planter box
Creating a planter box using a Dremel is a great DIY project for any level of a handyman. First, gather the necessary materials, including a Dremel, wood for the planter box, screws, a drill, and wood glue.
With the Dremel, cut the timber into the desired sizes for the planter box. Once the wood is cut, use the drill and screws to connect the pieces of plywood.
Make sure to use wood glue for added strength. Next, sand the edges of the planter box with the Dremel to ensure a smooth finish.
To finish, apply a coat of sealant to protect the wood from the elements. With a few simple steps, you have a beautiful planter box that you can customize to your style and decor.
